Porsche Cayenne S Manual: A Comprehensive Guide
This guide provides detailed instructions for operating your Porsche Cayenne S, accessible through print, PCM, online resources, and the My Porsche app.
Welcome to the comprehensive guide for your Porsche Cayenne S! This manual serves as your primary resource for understanding and operating all the functions of your vehicle. Porsche provides this information in multiple formats – a traditional printed copy, an interactive version within the Porsche Communication Management (PCM) system, a readily accessible online manual, and conveniently through the My Porsche app.
Whether you’re a seasoned Porsche enthusiast or a new owner, this manual will equip you with step-by-step instructions, crucial safety information, and valuable insights into maximizing your driving experience. It covers everything from basic operation to advanced features, ensuring you can confidently and safely enjoy all that your Cayenne S has to offer.
Understanding Your Vehicle’s Manual
The Porsche Cayenne S manual is designed to be a user-friendly resource, offering detailed guidance on all vehicle functions. It’s crucial to familiarize yourself with its structure and the various ways to access it. The manual isn’t just about operation; it includes vital safety information, maintenance schedules, and troubleshooting tips.
Porsche provides access through several channels: the in-car PCM system (for certain model years), a dedicated website allowing searches by model year or VIN, and the convenient My Porsche app. Understanding these access points ensures you always have the information you need, whether you’re on the road or preparing for a journey. Regularly consulting the manual enhances your ownership experience.

Accessing the Porsche Cayenne S Manual
Locate your Cayenne S manual via Porsche Communication Management (PCM), the official Porsche website, or conveniently through the My Porsche mobile application.
Owner Manual in Porsche Communication Management (PCM)
Accessing the owner’s manual directly within your Porsche Cayenne S’s Porsche Communication Management (PCM) system is remarkably straightforward. From the home screen, simply navigate and select the “Drivers Manual” option.
For specific model years, the location may differ slightly. Owners of 911 models (2019-2021), Panamera (2021), and Macan (2019-2024) can find the digital manual by going to CAR > CONTROL > Manual.
This integrated approach allows for quick and easy access to vital information while on the road, ensuring you have the guidance you need at your fingertips.
Owner Manual Website Access
Porsche provides convenient online access to the Cayenne S owner’s manual through their official website. You can easily view and search the manual by selecting your specific model year or, for even greater accuracy, by entering your vehicle’s unique Vehicle Identification Number (VIN).
This online resource ensures you always have the most up-to-date information regarding your vehicle’s features and operation.
The website offers a user-friendly interface, allowing for efficient navigation and quick retrieval of specific details.

Visit manual.porsche.com to explore this valuable resource and enhance your ownership experience.
My Porsche App Manual Access
For ultimate convenience, the Porsche Cayenne S owner’s manual is readily accessible through the My Porsche app on your smartphone. This feature allows you to have critical vehicle information at your fingertips, anytime and anywhere.
Simply ensure your vehicle is linked to your My Porsche account. Once connected, navigate to the “Vehicle” section within the app and select “Manual” (represented by a / icon).
This provides instant access to the complete digital owner’s manual, enabling you to quickly reference procedures and understand your vehicle’s functionalities.
Download the My Porsche app today for a seamless and connected ownership experience!

Key Features & Operation ౼ Cayenne S
Explore the Cayenne S’s advanced features, including dashboard understanding, driving modes, PASM, and PTM, for an optimized and exhilarating driving experience.
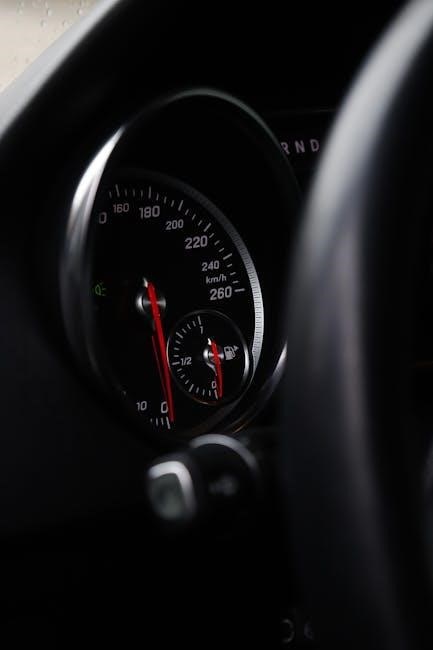
Understanding the Cayenne S Dashboard
The Cayenne S dashboard presents crucial vehicle information for a safe and informed driving experience. Key indicators include speed, engine RPM, and fuel level, displayed prominently for immediate reference. Warning lights alert drivers to potential issues, requiring prompt attention.
The central display, integrated with Porsche Communication Management (PCM), provides access to navigation, entertainment, and vehicle settings. Drivers can customize the display to prioritize preferred information. Understanding the various icons and symbols is essential for interpreting the vehicle’s status. Regularly monitoring the dashboard ensures proactive maintenance and enhances overall driving confidence. Familiarize yourself with the manual for a detailed explanation of each indicator and its significance.
Cayenne S Driving Modes Explained
The Cayenne S offers selectable driving modes to tailor performance to various conditions. These modes adjust engine response, suspension settings, and Porsche Traction Management (PTM) for optimal control. “Normal” mode provides a balance of comfort and efficiency for everyday driving.
“Sport” mode sharpens throttle response and stiffens the suspension for a more engaging experience. “Sport Plus” further enhances performance, ideal for spirited driving. Additional modes, like “Off-Road,” optimize the vehicle for challenging terrain. Understanding each mode’s characteristics allows drivers to maximize the Cayenne S’s capabilities and enjoy a customized driving experience. Consult the owner’s manual for detailed descriptions of each mode and their specific effects.
Porsche Active Suspension Management (PASM)
Porsche Active Suspension Management (PASM) is an optional system enhancing the Cayenne S’s ride comfort and handling. PASM continuously adjusts the damping force of each shock absorber, adapting to road conditions and driving style. This results in improved stability during cornering and a smoother ride on uneven surfaces.
Drivers can select different PASM settings, typically Comfort, Sport, and Sport Plus, to prioritize either ride comfort or performance. The system works in conjunction with the driving mode selection, further customizing the vehicle’s dynamics. Refer to your owner’s manual for detailed information on PASM operation and available settings, maximizing your Cayenne S driving experience.
Porsche Traction Management (PTM) System
The Porsche Traction Management (PTM) system is a sophisticated all-wheel-drive system enhancing the Cayenne S’s traction and stability. PTM intelligently distributes power between the front and rear axles, adapting to changing road conditions and driving situations. It proactively manages wheel slip, ensuring optimal grip and control.
Typically, PTM operates with a rear-wheel-drive bias for a sporty feel, but can seamlessly shift power forward when needed, such as during acceleration or on slippery surfaces. This system works in harmony with Porsche Stability Management (PSM) for enhanced safety. Consult your owner’s manual for a comprehensive understanding of PTM’s functionality and its interaction with other vehicle systems.

Maintenance & Care
Regular maintenance, including fluid checks, tire pressure monitoring, and scheduled servicing, is crucial for optimal performance and longevity of your Cayenne S.
Recommended Maintenance Schedule
Maintaining your Porsche Cayenne S according to the recommended schedule ensures its reliability and performance. Porsche provides a detailed maintenance schedule based on mileage or time, whichever comes first.
Key services include annual oil and filter changes, inspection of brake components, coolant level checks, and tire rotations. More extensive services, like spark plug replacement and fluid flushes, are required at specific intervals.
The Porsche Communication Management (PCM) system may also provide reminders based on your vehicle’s usage. Refer to your owner’s manual or a Porsche service center for the precise schedule tailored to your Cayenne S model year and driving conditions.
Checking Fluid Levels (Oil, Coolant, Brake Fluid)
Regularly checking fluid levels is crucial for your Cayenne S’s health. Locate the dipstick for engine oil – typically yellow or orange – and ensure the level is between the minimum and maximum marks when the engine is cold.
For coolant, check the expansion tank when the engine is cool; the level should be near the ‘MAX’ line. Brake fluid levels are visible in the reservoir, usually located in the engine bay.
Always use Porsche-approved fluids. Low fluid levels can indicate leaks or potential issues. Consult your owner’s manual for specific locations and procedures, and address any concerns promptly with a qualified technician.
Tire Pressure Monitoring System (TPMS)
Your Porsche Cayenne S features a Tire Pressure Monitoring System (TPMS) that alerts you to low tire pressure, enhancing safety and fuel efficiency. The system displays individual tire pressures within the Porsche Communication Management (PCM) system.
Recommended tire pressures are found on a sticker located on the driver’s side doorjamb and in your owner’s manual. Regularly check pressures with a reliable gauge, especially with temperature changes;
If the TPMS warning light illuminates, check all tires and inflate as needed. If the light persists, a sensor malfunction may require professional attention. Maintaining correct tire pressure optimizes handling and extends tire life.
Replacing Windshield Wipers
Maintaining clear visibility is crucial for safe driving. Your Porsche Cayenne S windshield wipers should be replaced when they streak or fail to clear the windshield effectively. Replacement is a straightforward process.
Lift the wiper arm away from the windshield. Locate the release tab on the wiper blade and press it to detach the old blade. Align the new wiper blade with the wiper arm connector and click it into place until secure.
Lower the wiper arm gently back onto the windshield. Repeat the process for the other wiper blade. Ensure both blades are firmly attached before driving.

Safety Features & Systems
The Cayenne S incorporates advanced safety systems like Porsche Stability Management (PSM), an airbag system, and Porsche Hill Control for enhanced protection.
Porsche Stability Management (PSM)
Porsche Stability Management (PSM) is a crucial safety system within the Cayenne S, designed to enhance driving stability, particularly during challenging maneuvers. It actively intervenes to help the driver maintain control by selectively applying the brakes to individual wheels.
PSM works by constantly monitoring vehicle dynamics, including steering angle, yaw rate, and lateral acceleration. If the system detects a deviation from the driver’s intended path, it automatically intervenes. This intervention can include reducing engine power and applying brakes to specific wheels to counteract oversteer or understeer.
While PSM significantly enhances safety, it’s important to remember it doesn’t eliminate the laws of physics. Drivers should always exercise caution and adapt their driving style to prevailing conditions. The system is a valuable aid, but responsible driving remains paramount.
Airbag System Overview
The Porsche Cayenne S is equipped with a comprehensive airbag system designed to provide occupant protection in the event of a collision. This system includes front airbags for both driver and passenger, along with side airbags integrated into the seats.
Additionally, curtain airbags deploy from the roofline to protect occupants in side-impact collisions. The system utilizes sensors strategically placed throughout the vehicle to detect the severity and type of impact. Based on this data, the airbags deploy with varying force to optimize protection.
It’s crucial to never place objects between occupants and the airbags, and children should always be properly restrained. Regular inspection of the airbag system warning light is recommended to ensure proper functionality.
Porsche Hill Control
Porsche Hill Control (PHC) is a system designed to assist drivers when starting on inclines, preventing rollback and ensuring a smooth, controlled launch. Activated automatically when the vehicle detects a slope, PHC holds the brakes for a brief period after the driver releases the brake pedal.
This allows the driver time to move their foot from the brake to the accelerator without the vehicle rolling backward. The system operates within a specific incline range and disengages once sufficient forward momentum is achieved.
PHC enhances driving confidence and simplifies hill starts, particularly in stop-and-go traffic or on steep gradients. It’s a valuable feature for both novice and experienced drivers.

Troubleshooting Common Issues
This section details solutions for warning lights, jump-starting procedures, and guidance for handling a flat tire on your Porsche Cayenne S.
Addressing Warning Lights
Understanding warning lights is crucial for maintaining your Porsche Cayenne S. These indicators signal potential issues requiring immediate attention. Refer to your owner’s manual for a comprehensive list and detailed explanations of each light. Ignoring a warning light could lead to more significant damage or compromise safety.
Common warning lights include those for low oil pressure, coolant temperature, brake system malfunctions, and tire pressure. The manual provides specific instructions on what actions to take when each light illuminates. Some lights indicate a need for immediate service, while others may simply require a fluid top-up or tire inflation.
Always consult the manual before attempting any repairs yourself. It’s essential to accurately diagnose the problem to avoid unnecessary costs or further complications. If unsure, contact Porsche Customer Support or a qualified technician.
Jump Starting the Cayenne S
If your Cayenne S battery is depleted, a jump start can get you going, but follow the procedure carefully to avoid damage. Consult your owner’s manual for the precise jump-starting instructions specific to your model year. Incorrectly connecting jumper cables can harm the vehicle’s electrical system.
Generally, you’ll need jumper cables and a functioning vehicle. Connect the positive (+) cable to the positive terminal of the discharged battery and the positive terminal of the assisting vehicle. Then, connect the negative (-) cable to the negative terminal of the assisting vehicle and a grounded metal part of the Cayenne S, away from the battery.
Start the assisting vehicle, let it run for a few minutes, then attempt to start the Cayenne S. If it doesn’t start, check connections and repeat.
What to Do in Case of a Flat Tire
Experiencing a flat tire requires immediate, careful action. Prioritize safety by pulling over to a level, stable surface away from traffic. Activate your hazard lights to alert other drivers.
Consult your Porsche Cayenne S manual for the location of the spare tire, jack, and lug wrench. Follow the manual’s instructions precisely for safely jacking up the vehicle and removing the flat tire. Ensure the parking brake is engaged before lifting the vehicle.
Once the flat is removed, mount the spare tire and tighten the lug nuts in a star pattern. Lower the vehicle and fully tighten the lug nuts. Remember to have the flat tire repaired or replaced as soon as possible, and check the spare tire’s pressure.
Technical Specifications
Detailed engine specs, dimensions, and weight data for the Cayenne S are available in the owner’s manual and Porsche documentation.
Engine Specifications ― Cayenne S
The Porsche Cayenne S boasts a powerful engine, with specific details outlined in your vehicle’s owner manual. Refer to the documentation for precise information regarding displacement, horsepower, and torque figures. These specifications can vary slightly depending on the model year of your Cayenne S.
The manual will also detail the engine type – typically a V6 – and its configuration. You’ll find information on the fuel injection system, compression ratio, and valve train design. Understanding these specifications is crucial for proper maintenance and optimizing performance. Always consult the official Porsche documentation for the most accurate and up-to-date engine specifications for your specific Cayenne S model.
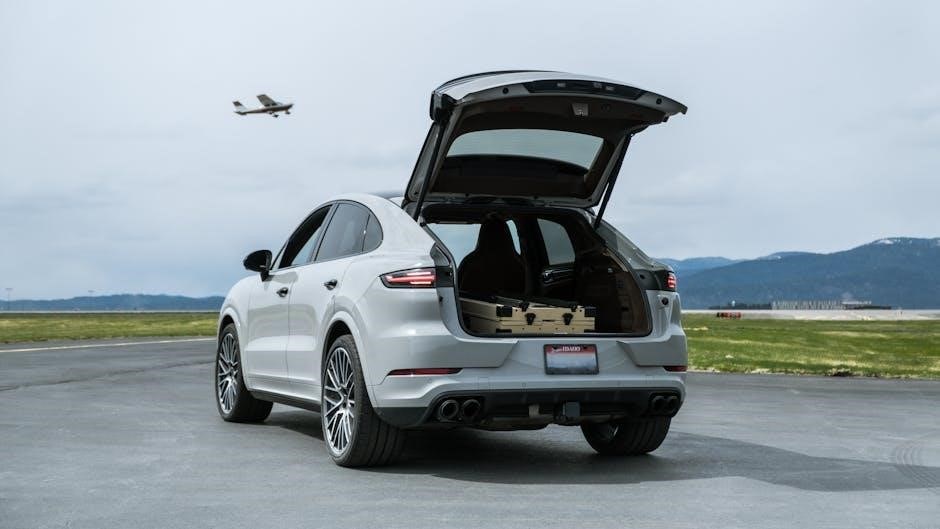
Dimensions and Weight
Your Porsche Cayenne S manual provides crucial dimensions and weight specifications for optimal understanding of your vehicle’s size and handling characteristics. These details include overall length, width, and height, essential for navigating tight spaces and assessing storage capacity.
The manual also outlines the vehicle’s curb weight, which impacts performance and fuel efficiency. You’ll find information on the gross vehicle weight rating (GVWR), indicating the maximum permissible weight. Knowing these figures is vital for safe towing and load distribution. Refer to the owner’s manual for precise measurements and weight limits specific to your Cayenne S model year, ensuring accurate information for all your driving needs.
Fuel Consumption Data
The Porsche Cayenne S manual details comprehensive fuel consumption data, crucial for understanding your vehicle’s efficiency and planning journeys. This includes EPA estimated MPG (miles per gallon) figures for city, highway, and combined driving conditions, allowing for realistic range calculations.
The manual also specifies fuel tank capacity, helping you determine refueling intervals. It’s important to note that actual fuel economy can vary based on driving style, load, and environmental factors. Your owner’s manual provides specific data tailored to your Cayenne S model year and engine configuration. Refer to it for the most accurate information, enabling informed decisions about fuel management and trip planning.
Additional Resources
For further assistance, explore Porsche Customer Support and vibrant online owner forums, fostering a community for sharing knowledge and experiences.
Porsche Customer Support
Porsche provides dedicated customer support channels to address any questions or concerns regarding your Cayenne S manual and vehicle operation. You can reach Porsche Customer Support through their official website, where you’ll find frequently asked questions, helpful articles, and contact information for direct assistance.
Their team of experts is equipped to guide you through the manual’s features, troubleshoot issues, and provide clarity on any aspect of your Porsche. Don’t hesitate to utilize this valuable resource for personalized support. Porsche is committed to ensuring a seamless ownership experience, and their customer support team is a key component of that commitment. They can assist with digital manual access and understanding complex systems.
Online Owner Forums & Communities
Engage with fellow Porsche Cayenne S owners through vibrant online forums and communities to share experiences and gain valuable insights regarding the vehicle’s manual and operation. These platforms offer a collaborative environment where owners discuss troubleshooting tips, maintenance schedules, and best practices for maximizing their Cayenne S’s performance.
You can find answers to specific questions, learn from others’ experiences with the manual’s features, and discover hidden gems about your vehicle. Participating in these communities fosters a sense of camaraderie and provides a wealth of knowledge beyond the official Porsche documentation. It’s a fantastic resource for all Cayenne S enthusiasts!